The system supports signal acquisition from two sensor classes:
- ** dry‑contact sensors providing potential‑free switch outputs, intended to interface with input circuits designed for contact closure detection, **
- ** digital sensors providing logic‑level outputs compliant with 3.3 V, representing binary high/low states. **
Supports I2C temperature, humidity and preassure BME280 sensor, 1-wire DS18B20 temperature sensors.
Supports for live video streaming from the Raspberry Pi camera, using MediaMTX as the streaming backend.
Supports wind speed meter, wind direction meter, rainfall meter.
RPiMS supports BME280 sensors via a Raspberry Pico running the BME280USB firmware. The Pico reads the sensor over I²C and sends measurements to RPIMS over USB, allowing the BME280 to be placed farther from the Raspberry Pi using a standard USB cable.
Sensors are polled and measured values are saved to Redis database periodically.
When any of the contact sensors opens or closed then a message will be sent to the Zabbix server.
When the digital sensor sets a high logic level, the message will be sent to the Zabbix server.
Video stream will be turned on automaticly when use picamera sensor are set to enable in setup.
RPiMS provides two independent methods of integration with Zabbix:
-
Zabbix Agent mode A Zabbix Agent running on the Raspberry Pi periodically retrieves all sensor readings and GPIO states from the RPiMS REST API and sends them to the Zabbix Server.
-
Direct API polling mode The Zabbix Server can directly query the RPiMS REST API to collect all sensor values and GPIO states without using a Zabbix Agent.
Both integration methods are supported by dedicated Zabbix templates included in the repository. The templates contain predefined items, discovery rules, and triggers for all available sensors and GPIO inputs.
RPiMS provides a built‑in /metrics endpoint compatible with Prometheus.
The endpoint exposes real‑time system and sensor data collected by RPiMS and stored in Redis.
Prometheus can scrape this endpoint to monitor the Raspberry Pi and all connected sensors.
The exported metrics include:
- CPU temperature
- contact sensors
- digital input states
- DS18B20 temperature sensors
- BME280 sensors (temperature, humidity, pressure)
- system statistics such as RAM usage, disk usage, and uptime
The metrics endpoint is available at:
http://<RPiMS_ipaddress>/metrics
This makes RPiMS fully compatible with Prometheus and Grafana, enabling dashboard creation for monitoring system health, environmental conditions, and IoT sensor states.
Download the image Raspberry Pi OS Lite - a port of Debian Trixie.
To writing an image to the SD card, use Imager.
The following steps must be performed on the computer where Ansible is installed (Linux, macOS, or Windows with WSL). This machine acts as the Ansible control node, which will remotely install RPiMS on the Raspberry Pi devices defined in the inventory file.
git clone https://github.com/darton/RPiMS.git
cd RPiMSOpen the inventory file that defines the Raspberry Pi devices where RPiMS will be installed:
nano ansible/inventory/hosts.iniIn this file, list the IP addresses and SSH credentials of your Raspberry Pi devices. Example:
[rpims]
192.168.1.50 ansible_user=pi
192.168.1.51 ansible_user=pi
Important: Your control machine must be able to connect to each Raspberry Pi via SSH.
Once the inventory is configured, start the installation:
ansible-playbook -i ansible/inventory/hosts.ini ansible/playbook.ymlThe playbook will:
- connect to each Raspberry Pi listed in
hosts.ini, - install all required packages,
- configure services,
- deploy RPiMS automatically.
- You run Ansible on your local computer, not on the Raspberry Pi.
- Raspberry Pi devices must be reachable over the network (SSH).
- All target devices must be listed in
ansible/inventory/hosts.ini. - The playbook handles the entire installation process automatically.
http://RPiMS_ipaddress/setup

http://RPiMS_ipaddress

This endpoint returns a JSON dictionary of all enabled sensors:
http://RPiMS_ipaddress/api/data/sensors/all

rpims.service, rpims-gunicorn.service, rpims-watcher.service, rpims-watcher.path,
redis.service, nginx.service, zabbix-agent
- After changing "RPiMS hostname" it is necessary to reboot Raspberry Pi OS for proper operation of zabbix-agent.
RPi  [VCC 3V3 Pin 1] ----------------------------- [VCC]  BME280
RPi   [GPIO.2 Pin 3] ----------------------------- [SDA]  BME280
RPi   [GPIO.3 Pin 5] ----------------------------- [SDC]  BME280
RPi    [GND - Pin 9] ----------------------------- [GND]  BME280
If you want to use BME280 sensor on long cable, copy two files
main.py and bme280_float.py from pico directory, to RPi Pico.
Connect the BME280 sensor to the i2C RPi Pico port:
RPi Pico  [GP22 Pin 29]------------------------------ [VCC]  BME280
RPi Pico  [GP16 Pin 21] ----------------------------- [SDA]  BME280
RPi Pico  [GP17 Pin 22] ----------------------------- [SDC]  BME280
RPi Pico  [3v3  Pin 36] ----------------------------- [CS]   BME280
RPi Pico  [GND  Pin 23] ----------------------------- [GND]  BME280
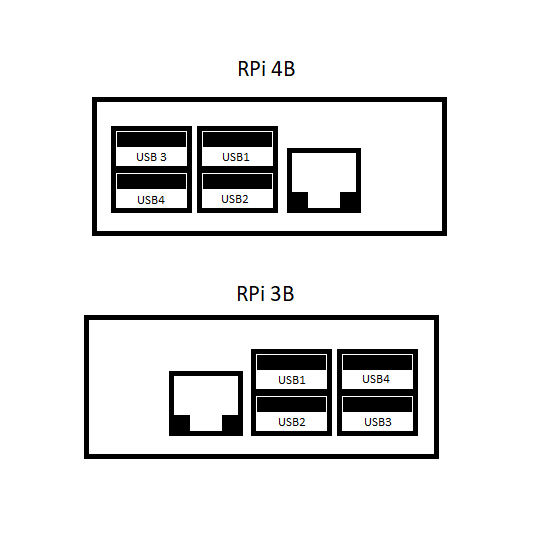
Connect the RPi with the RPi Pico together with the USB cable.
BME280 [i2c] <-- 4 wire cable --> [i2C] Raspberry Pi Pico [USB] <-- USB cable --> Raspberry Pi [USB]
Select USB port number in RPiMS configuration for the BME280 sensor.
RPi   [VCC 3V3 Pin 1] -----------------------------  [VCC]    DS18B20
                                               |
                                               \
                                               /   R1 = 4k7
                                               \
                                               |
RPi  [GPIO.4 - Pin 7] ----------------------------- [DATA]   DS18B20


RPi     [GND - Pin 9] ----------------------------- [GND]    DS18B20
RPi  [VCC 3V3 - Pin 1] -----------------------------  [VCC]    DHT22
                                               |
                                               \
                                               /   R1 = 4k7
                                               \
                                               |
RPi  [GPIO.17 - Pin 11] ----------------------------- [DATA]   DHT22


RPi      [GND - Pin 9] ----------------------------- [GND]    DHT22
I recommend using a level shifter and Vcc = 5V
RPi  [VCC 5V - Pin 2] --- [HV] - LEVEL SHIFTER --------------- [VCC]    DHT22
                                                         |
                                                          \
                                                          /   R1 = 4k7
                                                          \
                                                          |
RPi  [GPIO.17 - Pin 11] - [A1] - LEVEL SHIFTER - [B1]--------- [DATA]   DHT22
RPi  [VCC 3V3 - Pin 1] -- [LV] - LEVEL SHIFTER
RPi      [GND - Pin 9] ---[GND] - LEVEL SHIFTER -------------- [GND]    DHT22
RPi  [VCC 3V3 pin 1] ----------------------------- [VCC]  Display
RPi   [GPIO.2 pin 3] ----------------------------- [SDA]  Display
RPi   [GPIO.3 pin 5] ----------------------------- [SDC]  Display
RPi    [GND - pin 9] ----------------------------- [GND]  Display
RPi  [VCC 3V3 pin 1] ----------------------------- [VCC]  Display
RPi  [P11/SCLK] ---------------------------------- [SCLK]  Display
RPi  [P10/MOS] ----------------------------------- [SDC]  Display
RPi  [P8/CE0] ------------------------------------ [CS]  Display
RPi  [P25] --------------------------------------- [Data/Command control] Display
RPi  [P27] --------------------------------------- [Reset] Display
RPi  [P24] --------------------------------------- [Backlight] Display
RPi  [GND - pin 9] ------------------------------- [GND] Display
RPi  [VCC 3V3 pin 1] ----------------------------- [VCC]  DS3231
RPi   [GPIO.2 pin 3] ----------------------------- [SDA]  DS3231
RPi   [GPIO.3 pin 5] ----------------------------- [SDC]  DS3231
- BME280 - 1-3 pcs
- DS18B20 - 1 pcs or more (or DS18S20)
- Resistor 4k7 (for DS18B20 sensor) - 1 psc
- DHT11/DHT22/AM2302 - 1 pcs
- Door/window sensor - 1 or more pcs
- Motion Sensor - 1 or more pcs
- PiCamera - 1 pcs
- PiCamera Case - 1pcs
- Power Adapter (5V/2.5A or 5V1/3A for RPi4) - 1 pcs
- Rapsberry Pi - 1 pcs
- Raspberri Pi Case - 1 pcs
- Raspberry Pico - 1-3 pcs
- Sensor case for Pico and BME280 - 1-3 pcs
- RTC DS3231 I2C - 1 pcs
- LCD OLED 1,3" I2C SH1106 or 1.44" lcd_st7735 - 1 pcs
- Weather Meter Kit - 1 pcs
- ADC(STM32F030) or Pimoroni AutomationHat- 1pcs
Optional
- Waveshare OLED 1,3'' 128x64px SPI/I2C or Waveshare TFT 1,44'' 128x128px SPI - 1 pcs
- ITALTRONIC 25.0410000.RP3 - 1 pcs
- Male Headers 1x40 raster 2,54mm angle - 2 pcs
You need to import this templates into Zabbix server:
https://rpimsip/static/zabbix/Template_RPiMS_API.xml
or
https://rpimsip/static/zabbix/Template_RPiMS_Agent.xml
Testing the correct operation of the Zabbix agent
zabbix_get -s 127.0.0.1 -k "system.cpu.load[all,avg1]" --tls-connect psk --tls-psk-identity $(awk -F\= '/TLSPSKIdentity/ {print $2}' /opt/RPiMS/config/zabbix_rpims.conf) --tls-psk-file /opt/RPiMS/config/zabbix_rpims.psk
Sample commad result
0.881348
Testing RPiMS sensors
zabbix_get -s 127.0.0.1 -k rpims.sensors.json --tls-connect psk --tls-psk-identity $(awk -F\= '/TLSPSKIdentity/ {print $2}' /opt/RPiMS/config/zabbix_rpims.conf) --tls-psk-file /opt/RPiMS/config/zabbix_rpims.psk
Sample command results
{
  "bme280": {
    "id3": {
      "humidity": 33.625,
      "pressure": 958.329,
      "temperature": 23.603
    }
  },
  "contact_sensors": {
    "GPIO_12": 1,
    "GPIO_16": 1,
    "GPIO_18": 1
  },
  "cpu": {
    "temperature": 63.296
  },
  "digital_sensors": {
    "GPIO_13": 0,
    "GPIO_5": 0,
    "GPIO_6": 0
  }
}
- I2C interface should be enabled.
sudo raspi-config
Select Advaced Options -> I2C ->
- Edit the configuration file to add a new device.
sudo vi /boot/firmware/config.txt
Add a new RTC device DS3231 to the device tree
dtoverlay=i2c-rtc,ds3231
Reboot to take effect. About Device Tree, see: cat /boot/overlay/README
sudo reboot
- Read the Hardware Clock.
sudo hwclock -r
Read the system time:
date
- Set the Hardware Clock to the time given by the
--dateoption.
sudo hwclock --set --date="Aug-22-2019 08:29:00"
- Set the System Time from the Hardware Clock.
sudo hwclock -s
- Read the RTC and system times.
sudo hwclock -r; date
Remove fake-hwclock
sudo apt-get -y remove fake-hwclock
sudo systemctl disable fake-hwclock
Add the following lines to the file: /etc/systemd/system/rtc-init.service
[Unit]
Description=RTC initialization
After=multi-user.target
After=hwclock.service
Requires=hwclock.service

[Service]
Type=oneshot
ExecStart=/usr/sbin/hwclock --hctosys
ExecStart=/usr/sbin/hwclock --systz

[Install]
WantedBy=multi-user.target
Activate
sudo systemctl daemon-reload
sudo systemctl enable rtc-init.service
Restart your Pi and check the I2C state again with i2cdetect -y 1 to the RTC address is not UU anymore.
sudo sync
sudo reboot
Check if it works
timedatectl
sudo apt-get install i2c-tools
Optionally, to improve permformance, increase the I2C baudrate from the default of 100KHz to 400KHz by altering /boot/config.txt to include:
dtparam=i2c_arm=on,i2c_baudrate=400000
Next check that the device is communicating properly.
$ i2cdetect -y 1
       0  1  2  3  4  5  6  7  8  9  a  b  c  d  e  f
  00:          -- -- -- -- -- -- -- -- -- -- -- -- --
  10: -- -- -- -- -- -- -- -- -- -- -- -- -- -- -- --
  20: -- -- -- -- -- -- -- -- -- -- -- -- -- -- -- --
  30: -- -- -- -- -- -- -- -- -- -- -- -- 3c -- -- --
  40: -- -- -- -- -- -- -- -- -- -- -- -- -- -- -- --
  50: -- -- -- -- -- -- -- -- -- -- -- -- -- -- -- --
  60: -- -- -- -- -- -- -- -- -- -- -- -- -- -- -- --
  70: -- -- -- -- -- -- 76 --